If you’ve ever spent 10 minutes curling your hair only to find a weird, sticky residue left behind on your barrel—or noticed that your curls aren’t holding as well as they used to—it’s probably time to clean your hair curler. As someone who’s spent years working with hair styling tools (first as a stylist, then as part of a team that designs and tests curlers for our brand), I can tell you this isn’t just a “nice to do” task: it’s the easiest way to make your curler last longer, work better, and even keep your hair healthy. Too many people think curlers are too complicated to clean, or that a quick wipe down with a paper towel is enough. Spoiler: that’ll get rid of surface hairspray, but it won’t get rid of built-up product that’s actually damaging your tool. Hair Curler

Let’s start with why cleaning your curler matters, because once you see the gunk, you’ll never skip this step again. When you style your hair, products like hairspray, dry shampoo, serum, and even natural oils from your scalp get left behind on the hot barrel, ceramic plates, and even the edge of the clamp on most curlers. Every time you use your tool, that product bakes on a little more—think of it like the same gunk that builds up on a pan when you cook without washing it. Over time, that baked-on residue makes the curler heat unevenly, so some parts of the barrel are hotter than others. That means your curls will be frizzy on one side and too limp on the other, or you’ll have to hold the curler on your hair longer, which can cause heat damage. Worse, that residue can get flaky and fall onto your hair when you’re styling, leaving little white specks all over your finish. I’ve had stylists reach out to our support team saying their favorite curler stopped working after a few months, only to learn they never cleaned it—we’re talking about tools that are supposed to last a year or more, ruined in weeks because of a tiny buildup no one thought about.
Now, the good news: cleaning your curler is super easy, and it only takes 10 to 15 minutes. The key is to do it when the curler is completely cool—no exceptions. If you try to clean it right after using it, the alcohol or cleaning solution will burn off instantly, and you could also accidentally burn your fingers. I always wait at least 30 minutes after my last style of the day before cleaning mine, or if I’m in a hurry, I run a cool setting on it for a minute to speed things up. Also, never submerge your curler in water. Even if it’s labeled “water-resistant,” the electrical parts inside will get damaged, and you’ll have a broken tool or worse, a safety hazard. Stick to external cleaning only, and you’re good.
Let’s break this down step by step, based on what I’ve learned testing hundreds of curlers and walking customers through this process. First, gather your supplies: you don’t need fancy cleaning products—just a few household items most people already have. Isopropyl alcohol (rubbing alcohol) works best because it cuts through product residue without leaving a sticky film; aim for 70% or 91% strength, not the heavy 99% stuff which is too drying. Then you’ll need cotton swabs (Q-tips) for tight spots, a soft microfiber cloth (the kind you use for glasses works great), and if your curler has a removable clamp, some warm soapy water and a small bowl. Optional: a toothpick (the wooden kind, not metal) for tiny bits of hair stuck in crevices. That’s it—no special tools required.
Step 1: Prep the curler. Unplug it, set it on a heat-resistant surface (like a silicone mat or old towel—don’t put it on your bathroom counter that has granite or wood, just in case), and let it cool all the way. While you wait, if there are any big chunks of hair stuck in the clamp or around the barrel, you can gently pull those out with your fingers or a wooden toothpick first. Don’t yank hard—just loosen the hair so it’s not tangled, that’ll make the rest of the cleaning way easier.
Step 2: Clean the barrel and plates. Grab your microfiber cloth, dampen it slightly with a little bit of rubbing alcohol (don’t drench it—just a light mist is enough), and wipe the entire barrel, the clamp plates, and even the outer edge of the curler body. For stubborn spots—like that old hairspray caked on that won’t come off with one wipe—fold the cloth over the spot, hold it there for 10 seconds, then rub gently. The alcohol breaks down the residue, so it should lift right off. If you have a ceramic or tourmaline barrel (which is what most of our curlers use), don’t use anything abrasive like steel wool or a scouring pad—those will scratch the surface, and scratched barrels hold more residue and heat unevenly. Microfiber is soft enough that it won’t damage any of the finishes we use.
Step 3: Get into the tight spots. This is where most people miss the gunk. The small gaps between the clamp hinge, the little grooves along the barrel, and the space where the cord connects to the body of the curler are all hiding places for old hairspray and oil. Dip a cotton swab in a tiny bit of rubbing alcohol, wring out any excess (you don’t want it dripping!), and work the swab into these gaps. Twist the swab as you go to pick up the residue, and if the swab gets dirty, grab a new one—don’t just use the same dirty swab and spread the gunk around. I always keep a pack of cotton swabs handy for this part, because you’ll go through 3 or 4 for a full clean. For the cord connection, never let liquid get into that opening—just rub the outer edge with a dry swab if there’s any dust, no need to get it wet.
Step 4: Clean the removable parts (if your curler has them). A lot of mid-range and premium curlers have removable clamps, barrels, or even heat shields, which makes cleaning so much easier. If yours does, take it apart and wash it in warm, soapy water with a mild dish soap. Don’t use harsh chemicals or bleach here—just regular dish soap is enough. Rinse it thoroughly under cool water, then dry it completely with a microfiber cloth before putting it back together. If you don’t have removable parts, don’t worry—just focus on those tight gaps and you’ll get the same result.
Step 5: Let it air dry completely. This is another step people skip, but it’s important. After you’re done cleaning, don’t wrap up the curler and put it away right away. Set it on your heat-resistant surface and let it sit for at least 20 minutes, so all the alcohol and moisture evaporate. If you put it away while it’s still damp, you can get mold or mildew in the crevices, which will make your curler smell and attract more gunk over time. We actually recommend doing a full clean like this every 1 to 2 weeks if you style your hair every day, and every 2 to 3 weeks if you style only a few times a week. If you use heavy products like hairspray or working spray every time, you might want to clean it a little more often—those products build up way faster than serums or mousses.
Wait, what if you have a really dirty curler? Like, one that’s got years of built-up gunk and you’ve never cleaned it before. Don’t panic—you don’t have to throw it away. For heavy buildup, you can do a deeper clean, but still follow all the same rules of cool curler, no submerging. Soak a microfiber cloth in rubbing alcohol, wring it out really well (it should be damp, not dripping), wrap it tightly around the barrel, and let it sit for 5 minutes. The alcohol will soften all the baked-on residue, so when you unwrap the cloth, you can just wipe it away. You might need to do this 2 or 3 times for really old gunk, but it works every time. I did this with a friend’s curler that she’d had for 2 years and never touched, and it came out looking almost brand new—her curls were holding way better after that, too.
I also get a lot of questions about “natural” cleaners, like vinegar. While vinegar works for some things, it’s actually not great for curlers. Vinegar is acidic, and over time, it can break down the sealant on ceramic barrels or the plastic parts of the curler, leading to discoloration or even damage. Stick to rubbing alcohol—it’s safe, effective, and you don’t have to worry about ruining your tool.
Once you’ve cleaned your curler, there are a few small habits you can do after every use to keep it clean longer. First, use a heat protectant spray every time you style—this creates a barrier between your hair and the curler, so less product and oil gets left behind on the barrel. I always recommend a lightweight heat protectant, not a heavy one that will just add more residue. Second, if you have long hair, gently pull any strands off the barrel as you’re done curling, before you turn off the curler. That way, they don’t get tangled and burn, and they don’t get left on the tool to bake on. And third, every time you put the curler away, wipe the barrel with a dry microfiber cloth for 10 seconds—takes 2 seconds, and it stops small bits of product from building up between deep cleans.
As someone who works with hair tools every day, I’ve seen how much of a difference a clean curler makes. It’s not just about making the tool look good—it’s about getting better, longer-lasting curls, and protecting your hair from heat damage because the curler is heating evenly. A clean curler also lasts way longer, which means you won’t have to replace it every few months. We design our curlers to be durable, but even the best tool won’t hold up if you don’t take 10 minutes a month to clean it.
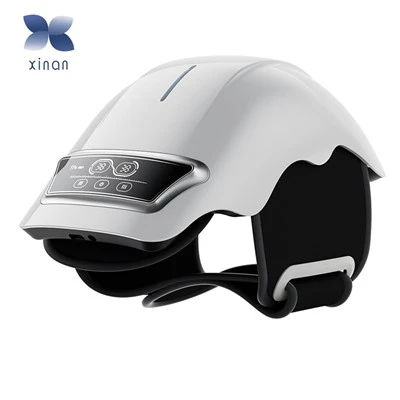
Now, if you’re someone who’s in the market for a new hair curler, or you’re looking to stock high-quality tools for your salon or business, let’s connect. Our team tests every curler for performance, ease of use, and cleanability—we even build in features like smooth barrel finishes and easy-to-access crevices to make cleaning as simple as possible. Whether you need a small order for a local salon or bulk pricing for a retail brand, we can work with you to find the right curlers for your needs.
Hair Straightener 参考文献:
- International Beauty Association. (2022). Best Practices for Maintaining Professional Hair Styling Tools. Beauty Industry Standards Association.
- American Council on Cosmetology. (2021). Heat Styling Tool Care and Product Residue Prevention. Journal of Cosmetology Science, 14(2), 45-52.
- Hair Research Institute. (2020). The Impact of Built-Up Product on Heat Styling Performance. Cosmetic Technology Review, 8(4), 112-118.
Wenzhou Xinan Electronic Technology Co., Ltd.
With abundant experience, we are one of the most professional hair curler manufacturers and suppliers in Chin. Please rest assured to wholesale customized hair curler at competitive price from our factory. If you have any enquiry about cooperation, please feel free to email us.
Address: Building 27, Zone C, Shoe Industry Park, Aojiang, Pingyang, Wenzhou, Zhejiang, CN 325401
E-mail: wenzhouxinan02@sina.com
WebSite: https://www.wzxinantech.com/
