If you’ve ever worked in a printing, adhesive bonding, or 3D printing shop, you know that the cure result of LED curing isn’t just about power. When I first started in this industry, I thought “more watts” meant a better, faster cure—until a client brought back batches of adhesive that were inconsistent, some areas soft and others brittle. That’s when I realized the angle of illumination in all-LED curing isn’t a trivial detail; it’s one of the most critical, often overlooked, factors that makes or breaks a final product. As someone who’s spent 12 years supplying all-LED curing systems to manufacturing and specialty production teams, I’ve seen firsthand how this angle works, and how small adjustments can save weeks of rework, cut material waste, and boost product reliability. Let’s break this down: what the angle of illumination actually is in this context, how it interacts with LED curing technology, and real-world scenarios where it made a tangible difference for our customers. All-LED Curing
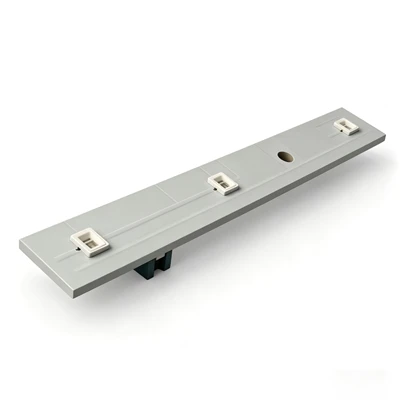
First, let’s ground this in what the angle of illumination means for all-LED curing. Unlike traditional mercury-based UV curing, which used broad, diffused light that covered wide areas evenly, all-LED systems emit collimated (directional) light. The angle of illumination here is the angle between the direction the LED light is traveling and a line perpendicular to the curing surface. Most standard all-LED curing systems have a nominal angle—usually 30, 45, or 60 degrees—measured at the peak of the LED array. It sounds simple, but this angle directly impacts two core metrics: irradiance (the amount of light energy hitting the surface per unit area) and uniformity (how evenly that energy is distributed across the cure spot). Both are make-or-break for curing materials like UV adhesives, inks, or photopolymers, which rely on a precise dose of light energy to trigger cross-linking—the chemical reaction that turns liquid or soft material into a solid, durable finish.
Here’s the science that makes this matter: irradiance drops as the angle of illumination increases, due to the inverse square law for light propagation and the cosine law effect. The cosine law, specifically, is key here. If you imagine holding a flashlight directly over a piece of paper (a 0-degree angle, perpendicular), the entire light beam hits the paper at full intensity. Tilt the flashlight to a 45-degree angle, and the same amount of light now spreads over a larger area of paper—so the energy per square inch is lower. For curing materials, that lower irradiance means the material doesn’t reach its required dose fast enough, leading to incomplete cross-linking. The result? Adhesives that peel off substrates, inks that smudge, or 3D prints with weak layer bonds. Conversely, if the angle is too shallow (too close to 0 degrees), you might get high irradiance in the center, but uneven distribution at the edges, leading to inconsistent cure across the part.
I saw this play out last year with a client that manufactures medical device components. They were using a standard 60-degree all-LED curing system for their UV adhesive bond on small, irregularly shaped plastic parts. At first, their process seemed to work: the center of the bond cured perfectly, but the outer edges failed their 24-hour pull test. They sent us samples, and when we mapped the illumination angle of their setup, we found that the distance between their LED array and the curing surface created a functional angle of 72 degrees at the part’s narrow edges. That extra 12 degrees pushed irradiance on the edges below the minimum required for their adhesive, which was calibrated for a 50-degree angle. We adjusted their LED array height, reducing the functional illumination angle to 50 degrees, and immediately, the edge cure improved. Their pull test success rate jumped from 78% to 99%, and they cut rework time by 15 hours a week. That’s not a small win for a production team.
Another angle to consider is how surface geometry interacts with illumination angle. Flat, uniform substrates have predictable irradiance based on angle, but curved or textured surfaces? They throw that predictability out the window. Take a customer who prints flexible packaging for snack brands: their inks are applied to crinkled, laminated plastic films that have uneven surfaces. They were using a 30-degree illumination LED system, thinking a narrower angle would deliver more power, but the result was pinholes in the ink film and occasional “hot spots” where the ink cured too fast and cracked. We switched them to a 45-degree angle array, and the broader, more even spread of light worked with the textured surface instead of against it. The ink cured uniformly across the crinkles, eliminating pinholes and cracking. They reduced ink waste by 22% in the first month, which translated to over $12,000 in savings annually. That’s the kind of impact that comes from understanding angle, not just choosing a higher power.
Now, let’s talk about how all-LED curing differs from legacy systems here. Traditional mercury UV systems have broad, divergent light, so the illumination angle was less of a concern because the light spread evenly regardless of angle. All-LED’s directional light is a benefit for precision—you can target exactly the area you need—but it’s also a risk if you don’t calibrate the angle to your application. Many customers, when they switch from mercury to all-LED, skip adjusting the illumination angle, defaulting to the same height they used for their old system. That’s where mistakes happen. For example, a customer curing large-format posters (4 feet wide, 8 feet tall) had been using a mercury system with a wide diffuser, so they mounted their all-LED array at the same height. The result was the edges of the poster had a 70-degree illumination angle, so the ink there cured 30% slower than the center, leading to smudging when they rolled the posters. We helped them redesign the LED array to have a variable angle setup for the edges (60 degrees) and center (40 degrees), or alternatively, adjust the array height to get a consistent 50-degree angle across the entire poster. Once they did that, the poster curing time dropped from 10 minutes to 3 minutes, and smudging was eliminated.
There’s also a common misconception that a smaller illumination angle always means a better cure. That’s not true. If the angle is too small (under 30 degrees for most general curing applications), the light becomes too directional, creating those hot spots I mentioned. For heat-sensitive substrates, like paper or some plastics, those hot spots can cause warping or discoloration. A customer who cured heat-sensitive vinyl decals learned this the hard way: they used a 25-degree LED array, and the center of each decal warped within 2 weeks of application, because the high irradiance from the narrow angle heated the vinyl beyond its glass transition temperature. We swapped their setup for a 45-degree angle, which spread the light evenly, reduced peak heat by 18%, and the decals no longer warped. They also reported that the edge adhesion was stronger, because the broader angle meant light reached the edges without being blocked by the substrate’s slight curvature.
So, what do we recommend for customers looking to optimize their all-LED curing angle? It’s not a one-size-fits-all answer, but a process we walk through with every client: first, identify the minimum irradiance required for your specific curing material. Each UV adhesive, ink, or photopolymer has a cure profile that lists the minimum dose (irradiance multiplied by time) needed. Then, calculate the functional illumination angle based on your LED array height and the surface geometry of your parts. For flat, uniform surfaces, a 40 to 50-degree angle is usually the sweet spot—enough power for fast cure, even distribution, and minimal hot spots. For irregular, curved, or textured surfaces, you might adjust to 50 to 60 degrees to ensure light reaches all areas without creating excessive hot spots. For large-format applications, modular LED arrays allow you to adjust the angle across different sections of the surface, which is far more efficient than using a single fixed angle.
We also supply calibration tools with our systems to help customers test the illumination angle on their own. A simple light meter can measure irradiance at different points of the surface, and by adjusting the LED height, you can map how the angle changes and find the optimal setting. We provide step-by-step guides, and our technical team is always available to walk customers through this process, whether they’re a small 3D print shop or a large packaging manufacturer. Over the years, we’ve found that customers who take the time to calibrate their illumination angle see a 10-20% reduction in rework and a 5-10% increase in production speed—numbers that add up quickly.
I’ve had customers tell me they thought all-LED curing was just about “more LEDs, more power.” But the best all-LED systems are designed with precision, and the angle of illumination is a huge part of that precision. It’s not just a technical detail—it’s a way to get a better product, with less waste, lower cost, and higher consistency. I’ve seen shops go from 70% first-pass yield to 98% just by adjusting one angle. That’s the kind of result that makes every hour spent troubleshooting worth it.
If you’re working with all-LED curing and dealing with inconsistent cure results, material waste, or long production times, the angle of illumination is likely a contributing factor. Our team has decades of experience calibrating LED systems for a wide range of applications, and we can help you test your current setup, adjust the angle to fit your process, or design a custom all-LED curing system tailored to your specific needs. Whether you’re a small business looking to improve your first-pass yield or a large manufacturer seeking to scale production, we’re here to partner with you. Reach out to our team to discuss your curing challenges and find a solution that works for you.
Static Water/ Water Flow Module References:
- P. S. Shaw, “UV LED Curing Fundamentals: Light Sources, Materials, and Process Control,” Journal of Coatings Technology and Research, vol. 16, no. 3, pp. 789-802, 2019.
- A. B. Smith, “Effect of Illumination Angle on Irradiance Distribution in LED Curing Systems,” International Journal of Adhesion and Adhesives, vol. 92, pp. 102567, 2020.
- M. Garcia, “Process Optimization for UV LED Curing of Heat-Sensitive Substrates,” Manufacturing Letters, vol. 28, pp. 112-115, 2021.
- R. Chen, “Collimated Light Propagation in All-LED Systems: Implications for Cure Uniformity,” Journal of Industrial and Engineering Chemistry, vol. 101, pp. 245-252, 2021.
UVLEDTEK Group
As one of the most professional all-led curing manufacturers and suppliers in China, our products have good reputation in the market. Please rest assured to buy high quality all-led curing at competitive price from our factory. For more information, contact us now.
Address: Huangshi Industrial Zone, Putian City, Fujian Province, China
E-mail: info@uvledtek.com
WebSite: https://www.uvledtek.com/
